The MPPT solar controller is an integral part of the solar photovoltaic system. It detects the voltage of the solar panel in real time and tracks the maximum voltage and current value (VI), allowing the system to charge the battery at the maximum power output. In order to ensure the normal operation of the MPPT controller and extend its service life, the correct installation method is essential. This article will explain the installation method of the MPPT controller in detail. There are several steps involved in installing an MPPT (maximum power point tracking) solar charge controller. The following is a general guide to help you complete the installation process.
Tools and materials required
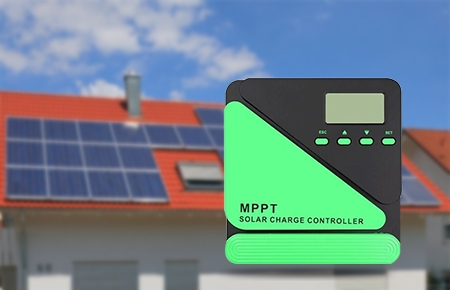
- MPPT solar charge controller
- Solar panel
- Battery bank
- Wiring (suitable for rated current specifications)
- Fuse and circuit breaker protection (as needed)
- Screwdriver
- Wire stripper
- Electrical tape (optional)
- Multimeter (for checking voltage)
Select the installation location
The MPPT solar charge controller should be installed on a solid surface to ensure stable fixation to prevent damage due to vibration or external force. The installation location should be convenient for heat dissipation, and avoid direct sunlight and high temperature environments. It is recommended to reserve enough space (such as 10cm or 150mm above and below) for heat dissipation. At the same time, if installed in a box, ensure that there is sufficient ventilation inside and outside the box. Keep away from humid, dusty places, flammable, explosive, and corrosive gases to ensure the electrical performance and safety of the solar charge controllers.
Step-by-step installation
Safety first
Before starting the installation, turn off all electrical equipment (solar panels for home, battery packs, etc.). Wear appropriate safety gear, such as gloves and goggles.
After unpacking, check whether the product accessories are complete, including the host, user manual, bracket, screws, etc.
Check whether the device is damaged during transportation. If damage or accessories are found, do not turn on the device and contact the carrier and dealer in time for processing.
Install the MPPT charging controller
Choose a dry, cool, and well-ventilated location. The MPPT charge controller should not be exposed to excessive heat or humidity.
Use screws or mounting brackets to mount the controller to a wall or panel. Make sure it is fixed correctly.
Fix the controller
Use a bracket or bracket to fix the controller to a vertical plane. Pay attention to ensure that the controller is in the correct direction during installation for easy observation and control.
If a wall mount is used, make sure the wall or mounting bracket is strong enough to bear the weight of the controller.
Connect solar panel wires
- Locate the solar input terminals: These terminals are usually marked as "PV+" (positive) and "PV-" (negative) on the charge controller.
- Connect the positive wire: Connect the positive (usually red) wire of the solar panel array to the "PV+" terminal on the charge controller.
- Connect the negative wire: Connect the negative (usually black) wire of the solar panel array to the "PV-" terminal on the controller.
If using multiple panels, connect them in parallel or series depending on the system voltage requirements and the specifications of the mppt solar regulator. Refer to the manufacturer's manual for wiring configurations.
Connect the battery bank
- Locate the battery terminals: These terminals are usually marked as "BAT+" (positive) and "BAT-" (negative) on the controller.
- Connect the positive battery wire: Connect the positive (red) wire of the battery bank to the "BAT+" terminal on the controller.
- Connect the negative battery wire: Connect the negative (black) wire of the battery bank to the "BAT-" terminal on the controller.
Make sure the voltage of the battery bank matches the input requirements of the MPPT controller.
Connect the communication cable (if any)
Insert one end of the communication cable into the corresponding communication port of the controller and the other end into the corresponding monitoring device or communication device.
Fuse and circuit breaker protection
- Install fuse: Place a fuse or circuit breaker between the mppt solar controller and the solar panel and battery. This is a safety measure to prevent overcurrent or short circuits.
- Solar fuse: The fuse between the solar panel array and the controller is important to protect the controller.
- Battery fuse: The fuse between the controller and the battery helps prevent short circuits or wiring errors.
Grounding
If the charge controller has a ground terminal, make sure it is properly grounded. Connect the controller's ground wire to a suitable ground point on the system.
Check voltage and connections
- Once the connections are complete, check that all connections are secure and not loose.
- Turn on the power to test and observe the controller's operating status and indicator lights to see if they are normal.
Start the system
- Turn on the circuit breakers and fuses for the solar panels and batteries.
- Turn on the MPPT charge controller. It should begin monitoring the solar panel voltage and charge the battery accordingly.
Monitor the system
After installation, monitor the controller's display to ensure that the solar system is working as expected. Some MPPT controllers have screens or indicators that show the charging status, voltage level, and current. Make sure everything is operating within normal range.
Following the above steps and considerations will ensure that your MPPT solar charge controller is installed correctly and safely and performs to its full potential in your solar PV system.